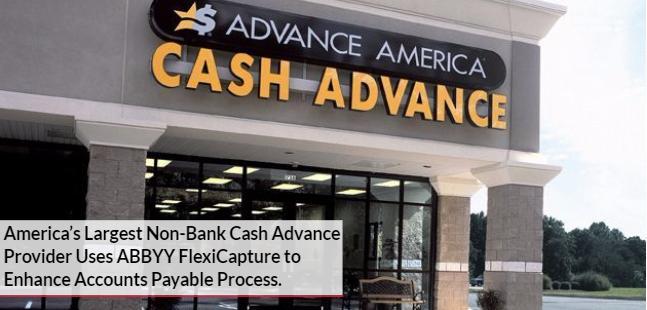
Advance America is one of the largest non-bank cash advance providers in the United States, and as part of its day to day business, processes on average 21,199 invoices a month. Always looking for ways to improve and streamline processes, Advance America decided to integrate ABBYY FlexiCapture for Invoices (ABBYY FCI) with their current solution to help streamline areas of their accounts payable process.
“It definitely has been a huge time saver. Even with the ones [invoices] that haven’t been fully mapped yet, it’s still faster than keying the invoices in by hand.”
Neal Littlejohn, EDI Administrator, Advance America
UFC’s customer, Wildman Business Group, receives praise by KMWorld. Learn how they benefited from ABBYY FlexiCapture for Invoices by reading the article here. We were honored to have the opportunity to help Wildman Business Group choose and implement the perfect product to meet their needs. If you would like User Friendly Consulting® to help you
Watch our video to see how simple it is to setup a “mailrooms” project where you can send a variety of documents into ABBYY FlexiCapture and let it determine the document type.
Hello. Today I’m going to show you ABBYY FlexiCapture from Mailrooms. Now, the Mailroom’s concept allows us to provide a variety of documents to the software and let the software determine what type of document it is. For example, we could be monitoring an email box, you could be scanning in a variety of documents and letting the software determine what kind of documents those are and how to route those. The very first thing we’re going to do in order to make that process happen is we’re going to use what ABBYY calls their classification designer. When you deal with the classification designer, you provide it a hierarchy of documents in like a file folder system setup.
You can see here I have my auto classifier projects started, and I provided it a sample set of documents. Now, that sample set is right here. These are the samples that I used, so I just provided a folder of documents here. I can go in here, and you can see those different documents that we did. We provided those to the software, and now what the software is going to do is allow us to control what happens here. We have what we call a training set and a testing set. The training set of documents are the ones that the software is going to consider itself fully trained on, so these are documents that you want to consider positive documents for that specific document type.
Then, of course, testing is so that we can throw a variety of documents at it and let the software tell us which ones it believes they are. That’s the difference between a training set, but the training set’s very important because that’s what the software is going to train itself upon. That’s what we’ve done, and you can see here we’ve sent in some documents, and you can see it’s trained. Then we can actually force the software to classify these by using our classify button. When it classifies them, it’s telling you what it believes that document is. We can kind of go through here and do just a few of those so you can see those. We can go into contracts and, of course, we can go into letters. You can see we had those categorized.
Now, we could, potentially in the real world, go deeper for a letter. For example, we can do things like positive letters or negative letters. If somebody’s sending us positive feedback, we may want that categorized and routed one way, and if it’s negative or a complaint, we may want that routed another way. That’s an example of how we could control different content of it. Now, the software uses two approaches, and you’re going to see that here in our properties. You can use what we call visual classifiers, which means the software’s going to look at the document and use the way that it looks at it to determine the document type, or we can use what we call content.
Content means that it’s going to use the text on the document, also known as OCR, to determine the type of document it is. Visual, once again, uses how the document looks like, and content looks at the actual text on the document. That’s why, of course, on a letter, for example, we use content instead of visual, because we’re all about the content on a letter. Now that we’ve classified, we’ve categorized our documents in the classification designer, all we need to do is train the software how these documents look, and that’s a very simple process. Now that we’ve categorized them, all we’re going to do is go to classification, and we are actually going to train the project.
Training will take all of this into effect. It will look at all of our documents in the training set and train itself on what these are. Now it’s completed. What we will do now that it’s done is we can actually send documents to the software and see how the software categorizes them. That makes us complete with the classification designer, so now we will jump into the FlexiCapture side of it, where we’re actually processing live documents. In order for you to see that, I’m going to send some documents in. I’m just going to send some random documents just so you can see these. Into the software, and we’ll let those cement here very quickly.
You can see the progress being reported on this middle, but the important part will actually come within the FlexiCapture setup statement when we look at the batch. I’m going to look at our working batches. Now, we’ll let this finish here. We did send, I don’t know, four or five documents. There is that batch that we just sent. If we look at the batch, we can see that there are four different documents that we sent. If we look at them, here’s the neat part, is the software has determined, based on the classification designer training that we did, what kind of document type it is. You can see that there. It believes this one’s a letter. It believes this one’s a banking document, which it is. It believes this one’s an ID card, which I’ll show you here that it is as well, so there’s your ID. That’s the top one I skipped.
This is an invoice. As you can easily see here, that’s obviously an invoice. That’s the neat part about the classification is we set it up in the classification designer so that it can be trained, but now FlexiCapture has determined the document type and will allow us to route and extract what we want off of those different types of documents. Just to give you a little bit of a peak, one more time behind the scenes, we use what we call a classification stage to do this. This is kind of where some of the nitty gritty happens, where we’re communicating with the classification designer and making sure that we understand what kind of document this could potentially be, and that’s where that classification step in the workflow, here, does its magic for us.
That’s a very quick demo of how FlexiCapture from Mailrooms worked. I hope you enjoyed it. If you have questions or have an interest for this in your organization, please contact us. Thank you so much.
Wildman Business Group Automates Invoices with ABBYY
As a premier provider of corporate laundry services, linen and apparel, Wildman Business Group receives more than 40,000 invoices a year. But processing them manually was slow, error-prone, costly, and inefficient — until ABBYY FlexiCapture for Invoices enabled accurate and automated entry of invoice data into Wildman’s ERP system.
“The difference is night and day. Before FlexiCapture, invoices were stacked on people’s desks. Now they’re routed electronically the day they arrive and approval goes much faster.”
Claudia Keirn, Corporate Senior Accountant, Wildman Business Group
Watch our video to learn how to setup and configure master data to be used within your ABBYY FlexiCapture for Invoices project.
Hello. Today I’m going to chat with you about how we set up master data for ABBYY FlexiCapture for Invoices.
Now, master data is a very, very important step in the implementation process, and the reason for that is because the master data actually helps us recognize information on the invoice. It makes the recognition quality much higher, and the better we do it and the better we prep for it, the better the outcome will be.
So, we’re gonna take this time and chat a little bit about it. Now, what I have in front of me is a database, and this can be any database. This is in SQL, but it can be in Oracle, it can even be in Access or any ODBC compliant database. But within the database, we have our master data. Master data consists of things like business units, cost centers, GL codes, purchase orders, purchase order line items as well as vendors.
Now, if we take a peek at the columns here, you can kind of see the information we expect to receive for vendor. Now, because this is a demo system, the information we have is actually quite basic. But for vendors, we can have multiple addresses, multiple states, multiple names, different codes and such that we reference them by. With our POs and line items, we have our PO header information, which is pretty normal. Typically a PO number, who the vendor is, and then how much that PO is for, and then we have our line items, of course, which get a little bit more technical, which are what the article number is, the quantities, the unit price, et cetera. So, those would be POs.
We have our GL codes. GL codes are just our expense account codes, so we can reference those any way that we want. But in this case, in my sample here, you can see I just have a GL code column, an ID column of course, and then a description column.
Cost centers are kind of very similar layout where we have a cost center name and then what business unit that goes to, and then of course we have a business unit table which has business unit, name, where they are, the addresses are, and things. Here’s a good example where we can have multiple names and addresses and states and cities for one record. I’ll just take a peek at that here to show you what the data looks like.
So, this is what we call master data. This is very, very important to have prepared before an implementation. It makes our implementation go very, very smoothly. So, what we’re going to do is set up a brand new FlexiCapture for invoices project. We’re gonna just go ahead and start our new project, and we will call this an invoices project, and we’ll go ahead and just create a new folder on our desktop, call it US invoices, and we’ll call this our US invoices project.
So, what’s gonna happen now, of course, is the project setup is gonna be created by default for the invoices project. It’s gonna create that project for us, and once this is done, we’re gonna go set up the master data.
Okay. Now that the project has been completed, we’ll close that and of course on an invoices project, we already have a document definition created for us, so what we will do is we will go into that invoice document definition. It depend on my other screen here, so I’m gonna drag this over for us to review. Of course, we have our typical out of the box fields here, which we’re not gonna study too much in this demo, but we can definitely reference those in other videos and through personal demos with you.
But in order to update the master data or even to set up the master data, we would go to document definition and then of course go to the properties. From here, we’re going to populate those data sets. Now, each one of these data sets are the data sets that you saw me have in my master data table in SQL, which again can be in any database format. But in this case, we’re gonna set up these to reference the database that I showed you earlier.
So, we’re gonna simply do setup, and then here we need to specify the connection string. You can see by default there’s not one specified. So, we’re gonna set this up. Of course, I know that we’re talking to SQL, and I’m just gonna set this up to be used for my own personal database here, and we know that this is the database. Of course we always want to test to make sure that works correctly, and then now knowing that that works correctly, we can go ahead and proceed.
Okay. Now that we can proceed, what we need to do is determine the schema. In this case, we’ll just go ahead and hit all, and of course in your environment you would want to determine what schema is best. Then of course we need to determine what table the business unit information is derived from. In this case, we will say business unit table. Now what we’ll do is we’ll match the field. So, we need to obviously match the fields in this data set for every one of those columns that we have in SQL, in the SQL table that I showed you. So, we’re gonna say the column ID within FlexiCapture, so it matched to this field called ID in SQL, and it’s very, very simple. You can kind of see once you map it, it looks like you can kind of see where it says it’s found, whether or not it’s normalized, et cetera, and what the externalized database column is. So, we will want to do that for every single one of these.
I do want to show you this. Now, if we have a column, and for this example we have name, but if we have a column that would have maybe references in multiple columns, like a name one, a name two, a name three, or sometimes an address that an address one, two, and three, you can use what we call several columns. Within several columns, you can drag which columns make up the name field. So, we can actually reference all of those. Same thing with street. Street is a very common one where we would reference every one of those. Then of course I’m just gonna go ahead and map these for us, and then we’ll do state as well, zip code. There are multiple zip codes, so we will go ahead and use several columns for that. If there’s a country code associated with it, we will do that, and then of course if there’s a value at a tax ID, we will do that as well.
If for some reason one of these columns is not associated with what you want to do, which for US we may not be using a value at a tax, but of course for other countries, especially European countries, we would. But if we do not want to use that column, we can simply tell the software that that is not used, and then hit okay.
Of course, within this screen, you have the ability to do a few things. You can tell ABBYY how often to update from that dataset. Whether or not the operator doing verification can add or edit records. For this demo, I’m gonna leave those blanks, but it would be something that you’d want to consider before processing invoices.
So, once that’s set up, you can see here we have what we call a connective field, and it’s obviously connected, but we still have no records. All we need to do to update the records is hit update, and when we do that, you should see our record count increases. So, if we go look at our business units table here in SQL, you can see we have 12 records, and now within ABBYY FlexiCapture we have 12 records as well. So, we will do the same setup for every one of these tables here. It actually is a very quick process.
Specify what you want the data to come from. In this case, we’ll just kind of keep this easy. We are working on the vendor, so, whoops, I hit the wrong fields here, so we would just set up the ID column, the name, the street, the street we are not using, so we would just tell the software not to use it, the city, the state, zip code, and the country code. If there’s a business unit associated with it, which I don’t think we’re using in this case, so we will say no, and if there’s a value at a tax field, which again, I think we will say no, we can move on.
Now, we can add fields here if you want to reference information from the dataset, besides what are shown here, but in this case, we’re gonna leave it out of the box.
So, once again, I set that up. All I need to do is update it. You’ll see now that I have three records, and that is also what I have in my database, so we’ll quickly set up the purchase orders. We’ll map these columns as well. You can see here it’s a very easy mapping session. All we need to do is map them and move on. Of course, after we map and you can see it’s connected, then we will want to update. You can see there we have those items set up. This is a very nice, simple process here where we just do that mapping. I think I missed on here, description. Once again, you’re just mapping the FlexiCapture field to the field in the database. Very, very simple. Some of these fields I know are not used, so we’re gonna go ahead and skip them. Okay. Very good.
Of course, once we do that, we need to update. The same process for GL codes and cost centers. We’re not gonna do that on the demo today because I think you understand now that the process is very simple. We just need to set up the source where it comes from, and then of course make sure it’s connected, and then when we’re connected, we just need to update. So, it’s very, very simple.
Now that we have the datasets defined, that’s kind of the core step in setting up an invoices project. So, we can save the document definition, and even from here, we can run a test batch for those vendors. We’ll actually go ahead and do that. We’ll just go ahead and create a test batch. We’ll load some images here, just to do our testing. You’ll see that the process will begin to do the recognition, and then the software will tell us when it’s done. There, it’s complete.
We can open it, and the important part here is that we determine the vendor. Now, once again, that’s all we set up, which is an out of the box project that we set up. So, it’s not set up to detect line times and those things yet. But we can obviously do that through the properties in the project. We’ll just load a couple other ones here to prove that those vendors are set up and that we’re detecting the vendor. If we get a vendor in this slot over here, that’s kind of the secret key to know that we detected it.
So, we just loaded a couple other ones. We just want to make sure that we found the vendor here, and once again we can look at that information for the vendor. This information just comes directly from the dataset that we just populated. Then of course our last one, and we have our vendor there.
So, that is a video of how you set up master data for an invoices project. It is actually a very simple process once we have the data in a location that is easy for us to reference, use, and adapt into the software. So, I hope you enjoyed the video. If you run into any struggles with this, please let us know. We’re very, very comfortable with this process, and would love to help you out. Thank you so much.
Watch this video to see how ABBYY FlexiCapture for Invoices can automatically export to Microsoft® Dynamics® Navision® (NAV) to create a purchase invoice including line item details and vendor information. Eliminate manual keying of data by AP analysts to allow them to focus on their core business functions rather than data entry.
Hello. Today I’m going to show you how to integrate ABBYY FlexiCapture with Navision 2016. Sometimes it’s called Navision and sometimes we call it Nav. For cases of this demo we’re gonna call it Navision.
Now what you see in front of me is ABBYY FlexiCapture. This is where we read details off the invoice. Then on my other screen where I’m gonna sneak it over here so you can see it, you will see that I have Navision open and we have currently no purchase invoices in the system at this time. So what we’re going to do is integrate ABBYY FlexiCapture with Navision, where we’ll transfer these invoices and the data that we pull off of them into Nav, therefore making the process very, very simple and clean for us. So let’s start off with ABBYY FlexiCapture, I’ll explain what you see on the screen.
What we did is we captured three invoices. And we’ll quickly look at them. First, if I double-click the first one you’ll see on the left is the information that we captured off of the invoice itself, and on the right you’ll see an image of the invoice for our reference. By clicking in the fields you can see that we highlight over here in yellow where we found that field, and also we have rules and different things that we can apply here.
Now, the purpose of today’s demo is not to explain every piece of architecture as far as ABBYY FlexiCapture for invoices go. We do have other videos that show quite a bit of the in-depth, behind-the-scenes work of this. But today we’re gonna focus on how the integration works with Navision. So let’s keep highlighting here what we have. We have our totals, we have our purchase orders that we can reference, and then we also have our line items here that we capture beautifully here at the bottom.
So let’s take a peek at these other two, and you’ll see here, once again, we can determine the business unit, the vendor, we can also expand and extract these fields to learn more information about either, business unit or vendor. We have the invoice numbers and dates, amounts, purchase orders, and then once again the line item details for this one. And lastly we have our final invoice, where we capture everything beautifully as well. Once again, on the left is what we extracted off of the invoice and on the right is a copy of the invoice for our reference.
So what we’re going to do now is export these into Navision. It’s a very simple process and we’ll kind of watch the logs here, and you’ll see that we have a process start and a process ended, meaning it started the export to Navision and it’s done, and we are gonna do that with three separate times, and now it is completed.
So now, being in Navision, we can hit our refresh button and you see we instantly have three new purchase invoices within the system. And we can double-click these, and within these, of course, we have our vendor information here at the top, sometimes called a “buy from” keyword. And then we have our line items here as well, and for the cases of the demo, we’re referencing a GL account. Now, this is completely customizable when you purchase our solution, but once again, for the purposes of this demo, we just assign them all to one GL account.
You can see we find things like quantities, unit of measures, unit costs, and those kind of things as well. So it’s very simple, the integration is, and you can see we have our other two purchase invoices that we integrated as well. I’ll just show these to you really quick so you can kind of understand what happens. Once again, we have the vendor information at the top and then our line items down here at the bottom. Once again, this is completely customizable and we have full integration technology that we can use to make this specific to what your organization is running today.
And we’ll look at our last purchase invoice here. Once again, our vendor information populates and then we also have our GL account line items. So that is how simple the integration is. You see we were able to automatically capture invoice details within ABBYY FlexiCapture, and then after we extract those details we’re able to export those directly into Navision, therefore making our accounts payable process fully automated and very, very easy to implement.
So I hope you enjoyed this video and how easy it was to see how that process flows for your organization, and we’d love to be of service to you if you have any questions. Thank you so much.
“Microsoft”, “Dynamics”, “Navision” and “Microsoft Dynamics” are trademarks of the Microsoft group of companies.
America’s leading supplier of Wheel Ends to OEM manufactures now receives over 200,000 paper invoices every year from its vendors. Manually processing the documents demands the time of twelve employees – a task that the company decided to automate using ABBYY FlexiCapture® for Invoices.
“Dealing with debit memos manually would take four people 3-4 hours a day. With FlexiCapture for Invoices, one person can do it in an hour.” EDI Group Manager
Watch Part 1 of our video series on the basics of document capture. We are providing these videos to educate viewers about the benefits of using document capture.
Watch this video from ABBYY USA to learn how ABBYY FineReader Server (formerly Recognition Server) provides network enabled, high-volume capture and OCR processing of images. This document capture solution processes images through high quality OCR while providing flexibility for export of images and metadata. See more at https://www.ufcinc.com/Data-Capture-and-OCR/abbyy-recognition-server
This is Part 2 of our video series on the basics of document capture. In this video, Travis goes into great detail on some specific elements of document capture. He will look at document processing and discuss OCR, OMR, and ICR. We are providing these videos to educate viewers about the benefits of using document capture.